How To
Setup
Main
Green Guide
Tour Pro
Rules Breaker
Setup
EDITION
To open the yardage book, we recommend you use “Acrobat Reader”.
We don’t have any shares in Adobe, but this viewer is free and remains the most reliable and widely used in the world.
You can download it free of charge from the following link (official website):
https://get.adobe.com/fr/reader/
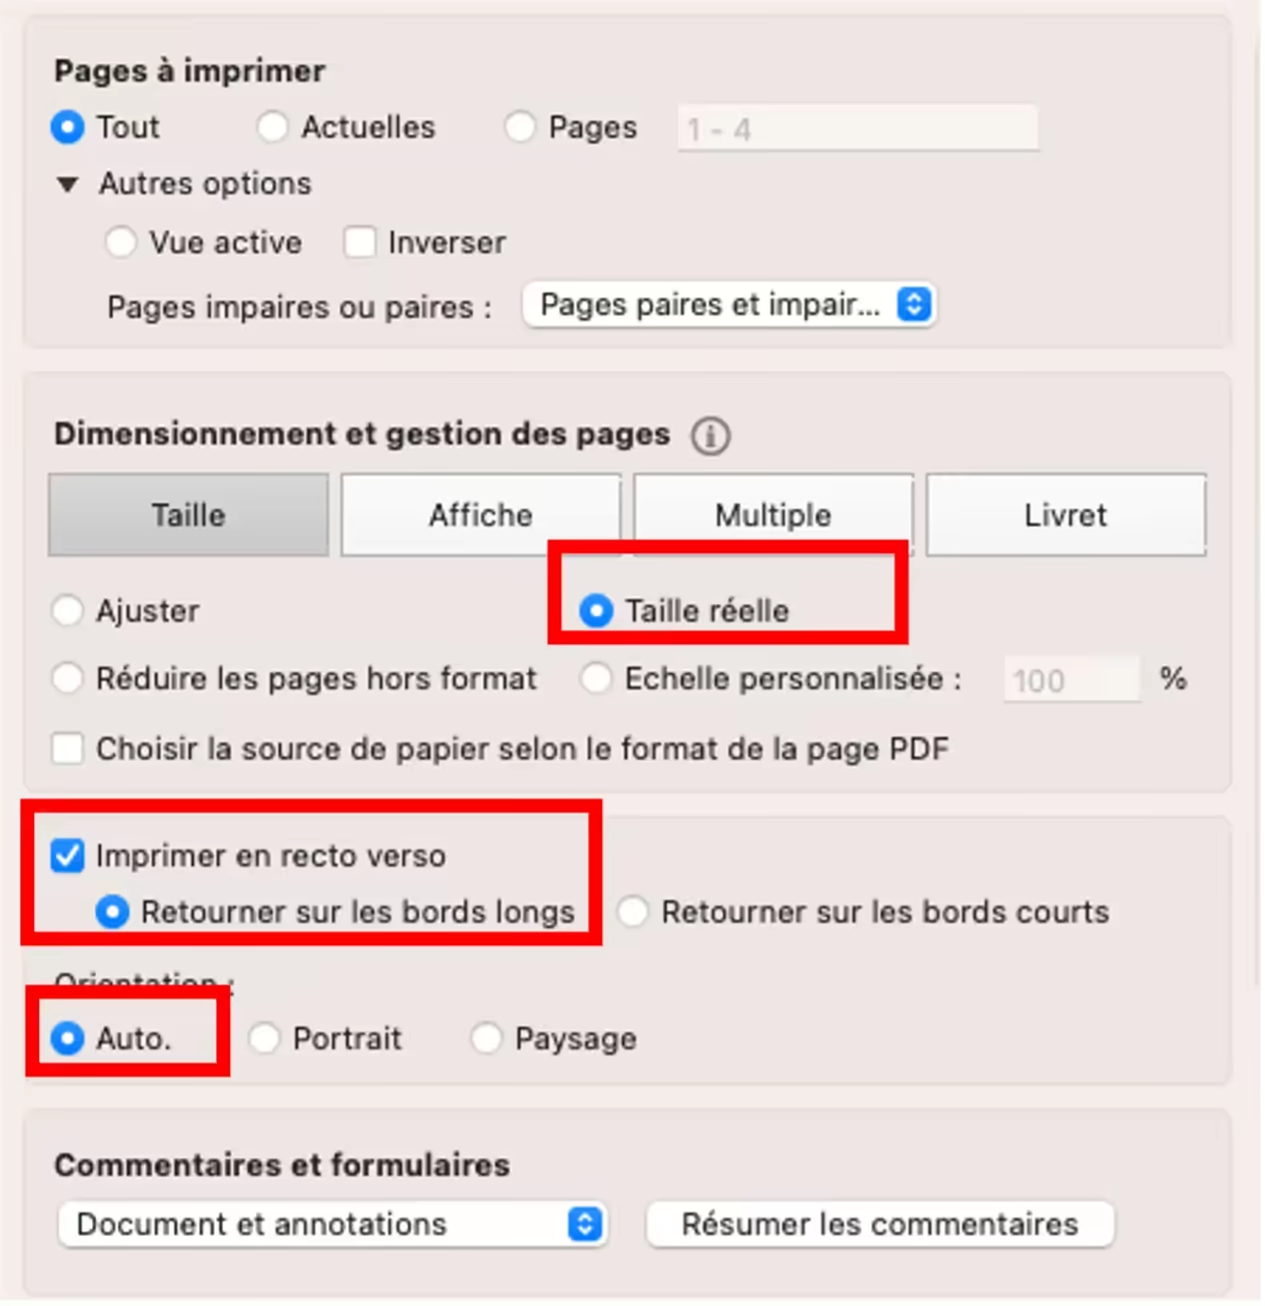
The A4 file creation mode enables double-sided printing with good page synchronization.
To do this, follow the printing instructions below:
- Pages to print: All
- Orientation: Auto or Landscape
- Size: A4 or Actual, depending on printer
- Recto/Verso: Turn over long edges
If you’d like to have a booklet with cardboard pages on the first and last pages, simply insert one (and only one) cardboard sheet on top of the stack in your printer’s tray. The book is created so that the first printed page matches the cover pages.
If you’d like to have a booklet with cardboard pages on the first and last pages, simply insert one (and only one) cardboard sheet on top of the stack in your printer’s tray. The book is created so that the first printed page matches the cover pages.
You’re free to print course books on any type of paper and weight. However, we recommend :
- A4 paper, white
- Standard paper weight is 80g. If you prefer a thicker paper, you can use 90g or 100g.
- For the cover, a paper weight of 130 to 200g will give you greater comfort.
If you don’t have a printer, or if you prefer more professional quality, you can have the booklet printed on professionnal shop.
Cutting
Material
- Printed Yardage Book with cut lines and bleeds.
- A cutter, a pair of sharp scissors or a paper cutter.
- A metal ruler.
- Cutting board (optional, but recommended to protect your work surface).
- Adhesive tape (optional).
- Stapler with 26/8mm staples (recommended for stapling more than 50 pages together).

Steps
- Preparation
- Make sure you have a clean, flat work surface.
- Place your booklet on the work surface.
- Identify trim lines and bleeds:
- Trim lines are usually thin, continuous lines indicating where you need to cut the booklet.
- Bleeds are areas of content that extend slightly beyond the cutting margins to avoid unwanted white edges after cutting.
- They are often marked by a background color or fill area.
- Edge trimming :
- Use the metal ruler to ensure that your cut will be straight and precise.
- Align the ruler along the cutting line you wish to cut.
- Using the cutter or scissors, cut along the ruler, applying constant pressure. Be very precise to avoid mistakes.
- Cutting corners :
- For corners, you can use the cutter or scissors. Make sure you cut the corners cleanly, following the cutting lines.
- Assembly (if necessary):
- If your booklet is made up of several pages or panels, assemble them in the appropriate order.
- The first sheet represents the cover
- The left-hand side represents the first pages of the booklet
- The right-hand side represents the last pages of the booklet
- So place the right-hand stack under the left-hand stack, then the two cover sheets above and below this stack.
- Check:
- After cutting all the pages, check that they fit together correctly and that trim margins and bleeds are uniform on all pages.
- Finishing:
- The grey strip at the top of the booklet is the space reserved for stapling. We recommend 3 staples (left, right and center) for greater stability.
- If you wish, you can use adhesive tape to reinforce the top of the booklet before stapling. Make sure the tape doesn’t obstruct the contents of the booklet.
- You’re done! Your cut booklet with cut lines and bleeds is ready to use.
- Preparation
Be sure to work with care when using knives or scissors to avoid injury. If you’re not comfortable with cutting, you might consider entrusting this task to a printing professional.
Main
Front Page

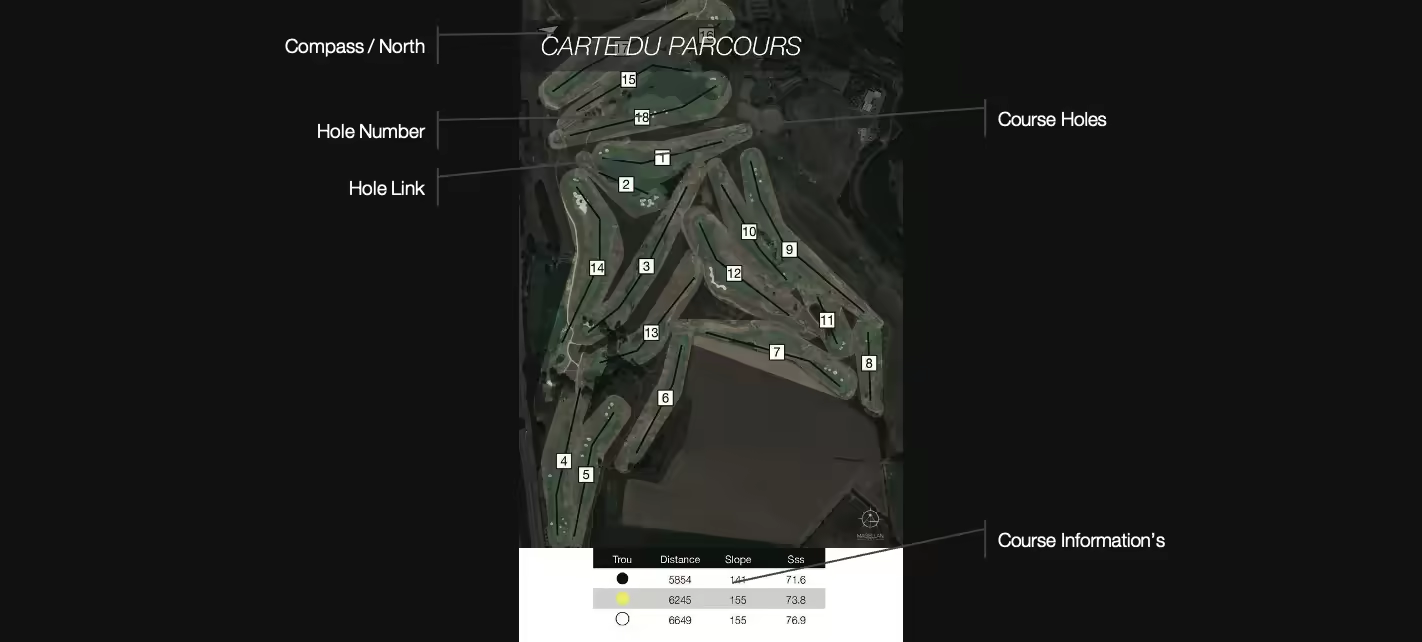
course map
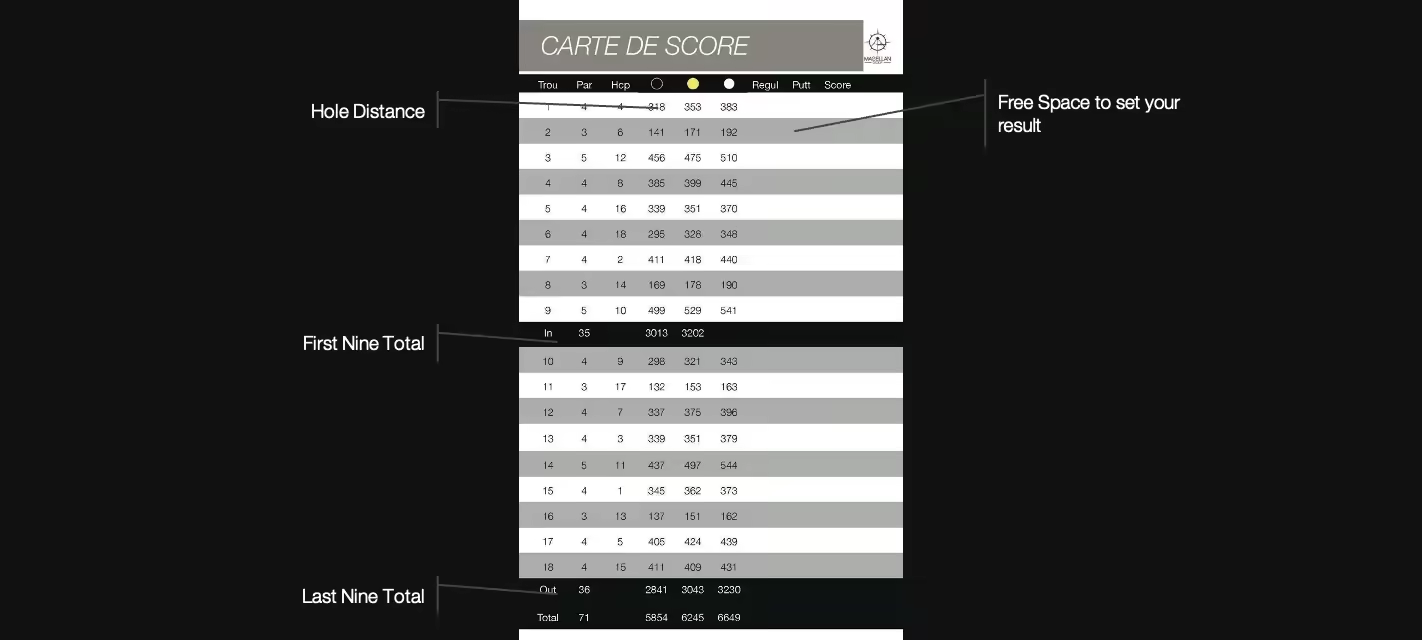
score cards
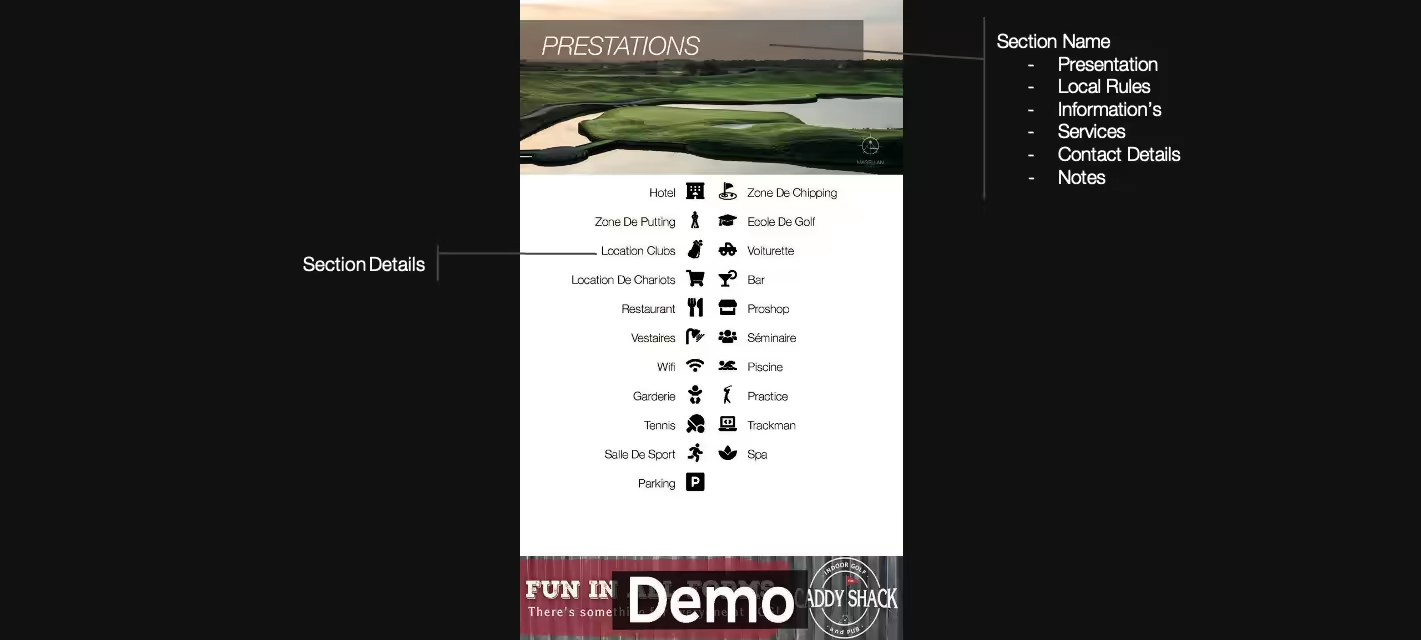
green

hole

section
Green Guide
Hole
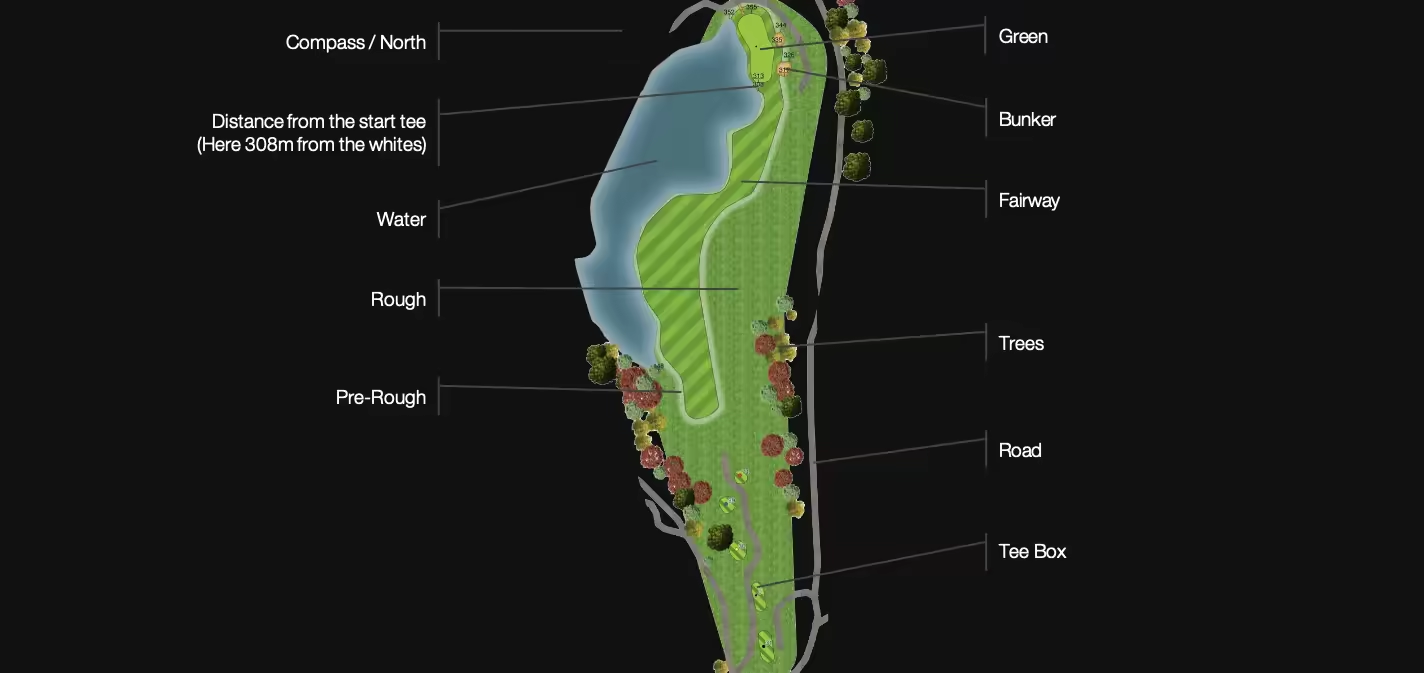
Green

Tee BOX

Tour Pro
Hole
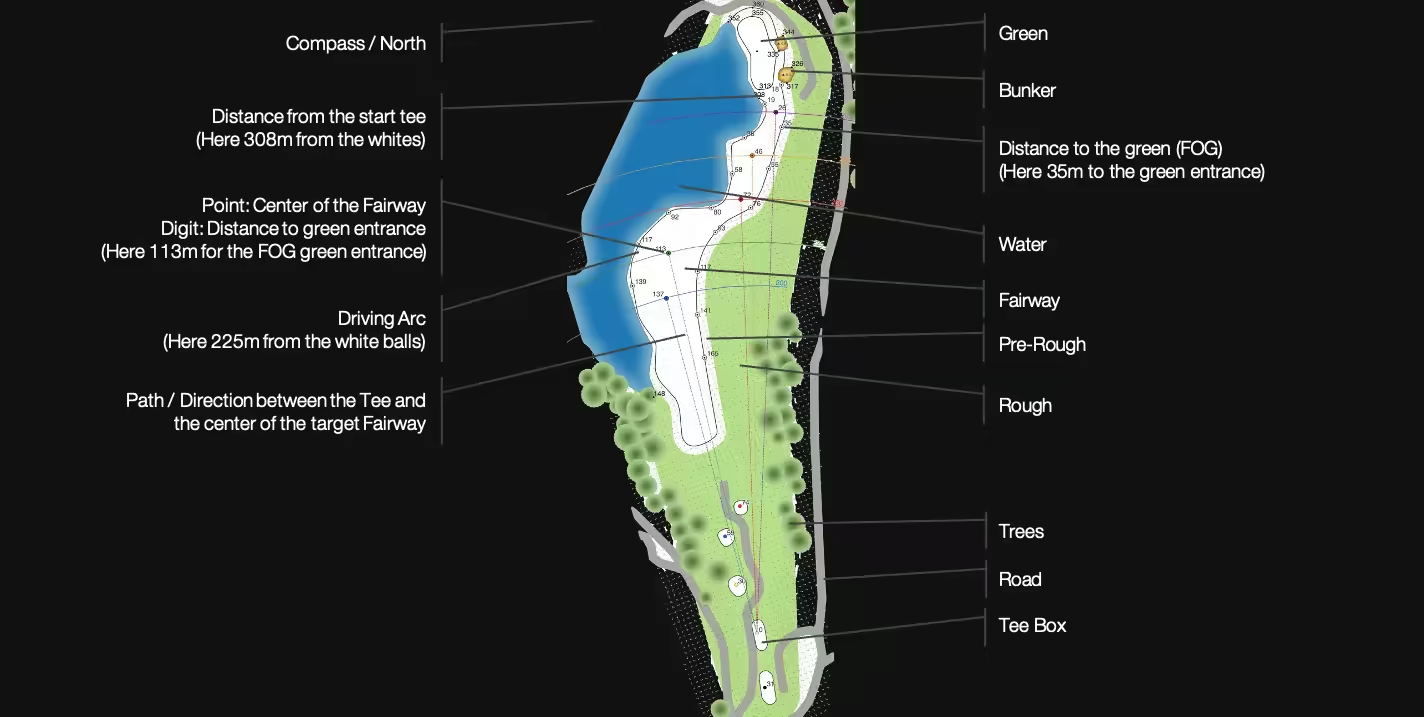
Green

Green’s slope :
- Indicates slope direction
- Only slopes greater than 2% (i.e. 2m difference over a distance of 100m) are shown here.
Contour line:
- Each line represents a different height/altitude (here every 20cm).
- Lines are drawn at regular heights.
- If the contour lines are very close together, this means that the mountain is very steep at this point. If they are more widely spaced, then the mountain is gentler.
Fairway slope :
- Indicates the direction of the slope
- Here we indicate all slope directions on the Fairway, regardless of their value.
- These slopes are indicated for each square metre of Fairway.
Tee BOX

Rules Breaker
Hole

Green

Green’s slope :
- Indicates slope direction
- Only slopes greater than 2% (i.e. 2m difference over a distance of 100m) are shown here.
Contour line:
- Each line represents a different height/altitude (here every 20cm).
- Lines are drawn at regular heights.
- If the contour lines are very close together, this means that the mountain is very steep at this point. If they are more widely spaced, then the mountain is gentler.
Fairway slope :
- Indicates the direction of the slope
- Here we indicate all slope directions on the Fairway, regardless of their value.
- These slopes are indicated for each square metre of Fairway.
Green - Heat Map

A heatmap is a graphical representation of elevation/relief variations on the Green. This map uses colors to indicate levels of altitude or elevation, making it easy to visualize variations in terrain.
Colors :
- The intensity of the green color (darker or lighter) can represent the intensity of elevation. The darker the green, the higher the altitude. Conversely, the lighter the green, the lower the altitude.
Slopes :
- Indicates slope direction
- The color of the arrows gives an indication of the slope percentage:
- Blue: Less than 1
- Green: Between 1 and 2
- Yellow: Between 2 and 3
- Orange: Between 3 and 4
- Red: Between 4 and 5
- Violet: Greater than 5
A slope of 2% corresponds to a difference of 2m over a distance of 100m
Green - slope

This representation gives a very precise view of the Green’s slopes. For each square metre of the Green, you can see the associated slope percentage.
The direction of the arrow indicates the direction of the slope
The color of the arrows gives an indication of the slope percentage:
- Blue: less than 1
- Green: Between 1 and 2
- Yellow: Between 2 and 3
- Orange: Between 3 and 4
- Red: Between 4 and 5
- Purple: Greater than 5
The value associated with the arrow gives the exact slope percentage
A slope of 3.3% corresponds to a difference of 3.3 m over a distance of 100 m.
Tee BOX

